Here you will find useful articles on health and fitness

Is it Time to Change up your Walking Routine?

Walking is one of the best things you can do for your health and there are ways to change it up to make it even better!

Change speeds! This challenges your balance and your muscles more than maintaining one speed for the duration of your walk.

If you walk the same route everyday try reversing it or walking somewhere new. This also helps keep your brain stimulated.

Try to include inclines and declines,( as long as you can do it safely), to work your muscles differently. This can also challenge your balance and posture. Make sure on the inclines you can remain up tall instead of leaning forward.

To work another set of muscles (the backs of your legs), as well as coordination and balance, try to add in walking backwards, safely of course.

Interval walking is a great way to change up your routine. It has both cardiovascular and muscular benefits. Recent studies in Japan found it also improved sleep, mood, metabolism, decreased blood pressure, and reduced age regulated muscle loss. Working on walking faster also helps improve your muscle power and balance.

The Japanese study found 3 minutes of fast walking and 3 minutes of moderate walking for 30 minutes total to be most beneficial, but I would recommended starting out with shorter bursts of fast walking. Example: start with 30 seconds fast walking and then 1-2 minutes of moderate walking.

How fast do you have to walk? Well it is up to you!

For maximum benefit, aim for increasing your heart rate and having a harder time conversing/talking. You will be slightly out of breath. Fast is considered to be 70% of your maximum effort.

For moderate walking speed, you want to be able to catch your breath and be able to walk while having a conversation. Moderate is considered to be 40% of your maximum effort.

Interval walking can be done anywhere, indoors or outdoors. It can be done for any fitness/ walking level. Doing it 3-4 times a week is recommended. I personally think that interval walking makes the time go by fast but also it’s more efficient because you don’t have to spend as much time doing it to be effective!

As always, let me know if you have questions or would like help with changing your walking routine!

Another reason to add planks and wall sits to your routine

If you have high blood pressure or would like to maintain your current blood pressure planks and wall sits can help! 

A large study done in the British Journal of Sports Medicine found that wall sits and planks (isometrics) reduced blood pressure more than aerobic/ cardio exercise, High intensity interval training and resistance training. All of these exercise programs helped to reduce blood pressure but the isometric exercises had the most significant reduction in both systolic (top number) and diastolic (bottom number) blood pressure.

Planks and wall Sits (also known as wall squats) are isometric exercises. Isometrics focus on the tightening/contracting of a muscle or muscle group where the joints don’t move and the muscles don’t change length. This type of exercises uses only body weight in a static position to strengthen and stabilize. 

They key for doing these exercises correctly is to slowly breathe in and out as you do them. You do not want to hold your breather or strain. That would actually increase your blood pressure!

When done correctly, isometrics can improve blood flow through the muscles being used, in turn reducing blood pressure.

Now of course this doesn’t mean other forms of exercise aren’t important but this is good news for a simple way to improve Blood pressure. These exercises can be done anywhere, anytime and you only need a wall to be able to complete. 

Wall sits strengthen glutes(buttock), quads(tighs) and core.

Planks strengthen your back, shoulders and core.

These can be modified if needed. Planks can be done using a wall or counter instead of on the floor. If doing them on the floor you can modify to doing them on your knees and progress if/when able to.

Doing these 3 times a week and increasing how long you can hold them for and work toward doing it 4 times with rest in between is recommended. 

Of course there are always options to make these exercises more challenging such as holding  a weight for a wall sit or changing/varying positions for planks.

If you would like further instruction on how to do these exercises or have any questions contact A to Z Personal Wellness.

Recommended Home Exercise Equipment

These items are what I use frequently, are versatile and are great for using at home!

Of course it is not necessary to purchase since I bring everything with me to sessions, but this is just if you want to purchase anything for yourself:)

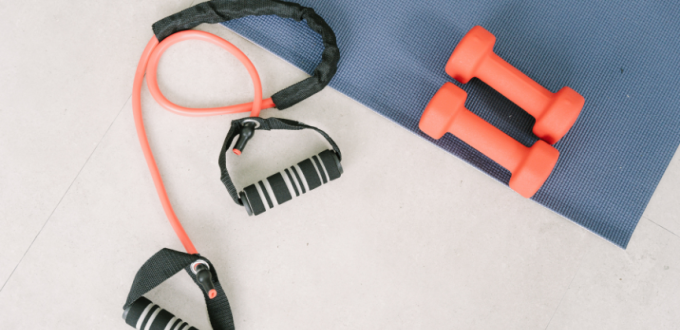
Exercise Loop Bands – Several levels of resistance, light weight, doesn’t take up much space and can be used anywhere. They can be used for various lower body, upper body and core exercises.

https://amzn.to/3TvlQxe

Exercise Bands with Handles– Various levels of resistance, lightweight and doesn’t take up much space. Can also be used in many spots of the house and for many different exercises.

https://amzn.to/3Iv3gPs

Door Anchor for resistance bands 

https://amzn.to/3PiDuBX

Balance Pad – Great for challenging your balance but also works as a cushion for any kneeling exercises

https://amzn.to/3TaEl8X

Adjustable Ankle/Wrist Weights – can be used on both wrists and ankles and weights in them can adjusted to be made lighter or heavier

https://amzn.to/3TvlJ4Y

Some Tips for Decreasing that Stiffness Feeling

Do you wake up in the morning feeling stiffness or after sitting try to stand up and feel stiff?

So why are you feeling so stiff? There can be several reasons for stiffness in specific areas of your body or just general stiffness. As we age, the amount of fluid lubricating our joints decreases and cartilage may also become thinner. Arthritis and lack of activity/movement can also cause increased stiffness. Also, if only certain muscles are being used that can also cause tightness and of course weakness in other muscles 

Why is the stiffness worse first thing in the morning or after sitting for awhile? Because those or the times when we are not moving for long periods of time. The fluid our joints need to be lubricated comes from movement.

So the simple answer to stiffness is keep moving!  Just remember “motion is lotion.”

Now finding the right movements is key because you don’t want painful movements.

Avoid those long periods of sitting or at least break them up with some movement every 30 minutes. 

If you are sitting for long periods of time or are always stiff when you get up after sitting, try to do some movements seated before you get up. 

Examples include – ankle circles or pointing your toes up and down to loosen your ankles, extend your leg out so that your leg/knee is straight and then bend it and repeat it several times. You can also try to round your back and then arch/extend your back into a nice tall postural position and repeat several times. Moving your leg to the side and then back and switching to the other leg and repeating several times can also help.

Here are some other ways to decrease joint and muscle stiffness that you can add into your daily routine:

  1. Daily stretching, could be stretching done before getting out of bed
  2. Stay hydrated – helps joints stay lubricated
  3. Move frequently throughout the day- doesn’t have to be for long periods of time or anything strenuous
  4. Stay warm – take a hot shower, wear layers, possibly crank up the heat in your house or wear extra layers, heating pad or hot packs can also help with this. Warmth increases blood flow and decreases stiffness. Cold causes muscles to tighten.

If you have questions or would like further guidance on movements that can help decrease stiffness feel free to reach out. 

Are You Activating Your Core?

You have probably heard of your core or activate your core or use your core or strengthen your core. Do you know how or why it is so important? 

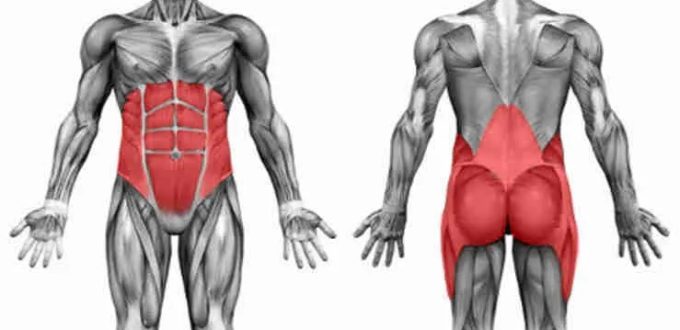
If you are unsure about what your core is, it is what connects your lower body to your upper body. It involves the muscles in your trunk, abs, hips, pelvis and muscles surrounding your spine.

It plays an important role in keeping us stable and balanced. Which means it helps prevent falls and also prevents any other injuries! The stronger our core the better our balance and coordination is.

The core is what supports your spine so if you have a strong core it can prevent or decrease back pain and improve your posture.

A strong core also allows for more effective strength training of other muscles in your body. The core is what we use for stability and mobility with everyday tasks so it is something we should use often and can practice daily. Housework, playing with grandkids and other daily activities will be easier and safer with a stronger core.

How to engage the core: Start by either lying down on your back with your knees bent or sitting in a chair. Pull your belly button in toward your spine to tighten/engage. Keep your spine in a neutral position, meaning nothing moves you are just tightening by pulling your belly button in. Keep breathing while you tighten. There can be a tendency to hold your breath but please keep breathing through it. Start with holding it tight for 3 seconds and slowly work up to be able to do 10 and then work up being able to hold it for 10 seconds. For more of a challenge try to activate your core while walking.

There are great core exercises that you can do anywhere and without any equipment. I recommend Bridges, Bird Dogs and Planks. These can all be modified to make easier or more challenging depending on your individual needs. Avoid sit ups and crunches as they have been found to be ineffective. 

As always please let me know if you have any questions or would like help with any core exercises.

Have You Heard of the Blue Zones?

There is currently a Netflix documentary on the Blue Zones called Live to 100: The Secrets of the Blue Zones with Dan Buettner. There are also books about the Blue Zones but the Netflix series has raised more awareness about them.

Maybe you don’t want to live to 100 but maybe you are looking to make changes in the new year or are working on or thinking about new year’s resolutions. Some tips from the Blue Zones might help you have the best year yet!

The Blue Zones are areas of the world where people live the longest and healthiest. I enjoyed watching the documentary and learning more about each area and their lifestyle habits…and bonus,…. they are all beautiful places which made me want to travel to them.

My biggest takeaways were that people in each Blue Zone:

1) Had a purpose/knew their purpose. They also knew their values and were valued by their communities.

2) Focused on the present

3) Saw friends or family everyday

4) Move naturally all day long – no gym or set exercise needed

5) Did not have a lot of chronic stress and they had daily routines to de-stress like naps, happy hour, prayer, etc.

6) Connection to elders is valued/treasured – people in these communities and families gained wisdom from their elders which allowed them to excel

7) Volunteered/served humanity

8) They had an 80% rule which is to eat until you are 80% full and then stop and they also ate their smallest meal of the day in the late afternoon/evening and didn’t eat after that. A lot of the food they eat comes from their own garden.

9) Daily happy hour! In the blue zones they would drink alcohol 1-2 glasses regularly with friends and food.

Other notes from watching the documentary are that in each Blue Zone family came first and most families were nearby or in the same home. They had social circles that consisted of people that supported healthy habits. Centenarians in these areas also tend to belong to some type of faith based community.

Gardening, housework, yard work, walking, taking the stairs, staying busy with different hobbies and being outside were the ways they stayed moving throughout the day. Less time sitting and more time moving. Less time driving and more time walking or biking places.

The Blue Zones lifestyle adds 10-12 years onto the average persons life expectancy.

So are you feeling inspired now? Maybe call up a friend and go walking. Set up a happy hour. Ask yourself why you get up in the morning? Make sure you know your purpose and can manage stress and enjoy life like those in the Blue Zones:) Happy 2024!

Frequently Asked Questions

Do I have to sign up for a package or contract?

No. Try it out and see if it works for you and stop whenever you want!

How often do you recommend sessions be?

It is flexible but I recommend 2 times a week to start especially to get into a routine and to make the most progress. If you plan to do some exercises on your own than 1 time a week is also good. 

If you want a program you can follow on your own, we can establish that and then decrease to every other week or monthly to progress or make changes etc. 

How does a virtual training session work?

It can be through zoom, FaceTime, over the phone etc. It is best for me to be able to see you in order to check your form and demonstrate the exercises.

Do you accept insurance?

No. I do accept Flexible Spending Account (FSA) or Health Savings Accounts (HSA) and if you deduct medical expenses from taxes you can also include this. I can send invoices to you session by session, monthly and/or yearly.

How should I pay for services?

Checks, Venmo and credit cards all are accepted. (Checks and Venmo are preferred) I can be paid per session, per week, or monthly.

What equipment do I need?

Nothing! I can figure out how to use what you have around the house/space and I have a trunk full of equipment I bring with me if needed.

I have a very small space, is that ok?

Yes! We can work with any space, no need for it to be big.

Where would we exercise?

It’s up to you; it can be in the kitchen, living room, basement, outside, a gym etc.

Can you write down what I should do on my own if I want to exercise on days I don’t have a session?

Of course! I can write exercises down, I can email or print out pictures of exercises for you. Whatever works best for you.

Can you keep my doctor, physical therapist and/or family member in the loop?

Yes, I think communication and collaboration is so important and always helpful.

If you have any other questions please feel free to contact A to Z Personal Wellness at any time.

Tips to Decrease the Aches and Pains of Fall Yard Work

It’s that time of year when there is lots of yard work to be done! The leaves look so pretty as they change colors but they sure do make a lot of extra work. Here are some tips to help you avoid all the “rakes and pains” 😉 

First tip is to warm up. You may not think of yard work as exercise but it is and it can be quite strenuous. So warming up 5-10 minutes before you start the yard work is a good idea.

2.) Since yard work is basically an exercise workout, treat it like one with rest breaks, stretching and hydrating!

3.) Wear long sleeves and pants to protect your skin from the sun, bugs, scrapes and scratches. Wearing gloves can also be helpful.

4.) Supportive shoes! Closed toed and slip resistant are best.

5.) Use a rake or leaf blower that suits your strength and height. 

6.) It is habit to use our dominant side to rake and do yard work with, but try to switch it up to even out your body and not overwork one set or side of muscles. 

7.) Rake when the leaves are dry. You might be anxious to get those leaves but waiting until they are dry is safest. Wet leaves are much heavier and also more slippery. Be smart and kind to your body!

8.) Bend at your knees and hips when lifting to avoid straining your back. Position yourself close to the object you are lifting and have your feet at least shoulder width apart. Use your legs to lift and avoid twisting to avoid injury and back pain.

9.) Engage your core as you lift, carry, pull, rake etc. To engage your core muscles pull your belly button in toward your spine to tighten, but make sure to keep breathing as you engage it and do your yard work. 

10.) Don’t overfill the leafbags, garbage cans etc!  It may seem like a faster way to do it but it is not the safest way. Lighter loads are better for your body to lift, pull and carry and stay pain free.

11.) Stretch after you are done.

Enjoy the fresh air, sunshine and physical activity!  

What is a PWR! Moves Instructor and how can it help with Parkinson’s?

I recently completed the PWR! Moves Instructor certification through Parkinson Wellness Recovery. It is a Parkinson’s Disease specific training course for exercise professionals. There are four main PWR moves that are the building blocks for this exercise program which can be modified and/or progressed to any level to meet the needs of everyone. These moves are designed to help people with PD function better and reduce their symptoms as well as improve their strength, balance, agility, flexibility and aerobics.

This exercise program and personal training challenges participants both physically and cognitively in a fun and supportive environment. The goal is for instructors to collaborate with Physical Therapists and Occupational Therapists so clients can go back and forth from rehab to community exercise or personal training.

The mission statement of Parkinson Wellness Recovery is to enhance access to and awareness of research driven exercises that improves quality of life for people with Parkinson’s disease. 

For people with Parkinson’s exercise really is medicine.  The right dose of exercise optimizes the medications for people with Parkinson’s. 

The main symptoms this exercise program targets is rigidity, bradykinesia, incoordination, and reduced self-awareness. The four main PWR! Moves are to help counteract the motor control skills that deteriorate and lead to loss of mobility and function in people with Parkinson’s. The focus is on functional whole body movements and trying to make larger and faster movements.

PWR! Moves can be done lying on your stomach, lying on your back, on all fours, sitting and standing depending on your ability and needs. There are functional benefits for all positions.  

The exercises target four foundational skills that impact everyday mobility: posture, weight shifting, trunk mobility, and stepping/transitions. 

Why focus on posture? To counteract stooped posture, rigidity, reduce falls and freezing and improve walking.

Why focus on weight shifting? It is necessary for any kind of moving, turning, rolling etc and it allows for better balance

Why focus on trunk mobility? It helps reduce rigidity and it is necessary for transitioning your body through space and different postures.

Why focus on Stepping and transitions? To move to different locations efficiently and effectively, to be able to react/catch your balance, and to strengthen your muscles.

The exercises are tailored towards your needs and symptoms to help you function better, be safe and manage your Parkinson’s symptoms better.

I really enjoyed taking this certification course because of all the scientific research involved in creating this exercise program and the exercises are all evidence based. These exercises also allow you to focus on the whole person and how to help them function at their best with Parkinson’s. Depending on the day they are having and symptoms they are experiencing exercises can easily be adjusted. I have already had one client notice an improvement with her tremors!

If you have questions about PWR! Moves and personal training or small group training for Parkinson’s contact A to Z Personal Wellness.